Sandra wasn’t trying to impress anyone. I’d stopped by her house on a random Tuesday afternoon to pick up a book I’d lent her months ago, and the smell hit me before I even made it past the front door. It was warm, savory, a little sweet—like Thanksgiving had decided to crash a regular weekday. She was standing in her kitchen in sweatpants, sliding this pan of golden, pull-apart sliders out of the oven, and she just shrugged when I asked what she was making. “Oh, just using up some leftover turkey and cranberry sauce,” she said, like it was nothing.
But it wasn’t nothing. Honestly, it was one of those moments where you realize the best recipes don’t come from fancy test kitchens—they come from people who just know how to make food taste good without overthinking it. I stood there watching her brush melted garlic butter over the tops of the little rolls, and I think I asked for the recipe before she even put the pan down. Maybe you’ve been there—you walk into someone’s kitchen and suddenly you’re hungry for something you didn’t even know existed five minutes ago.
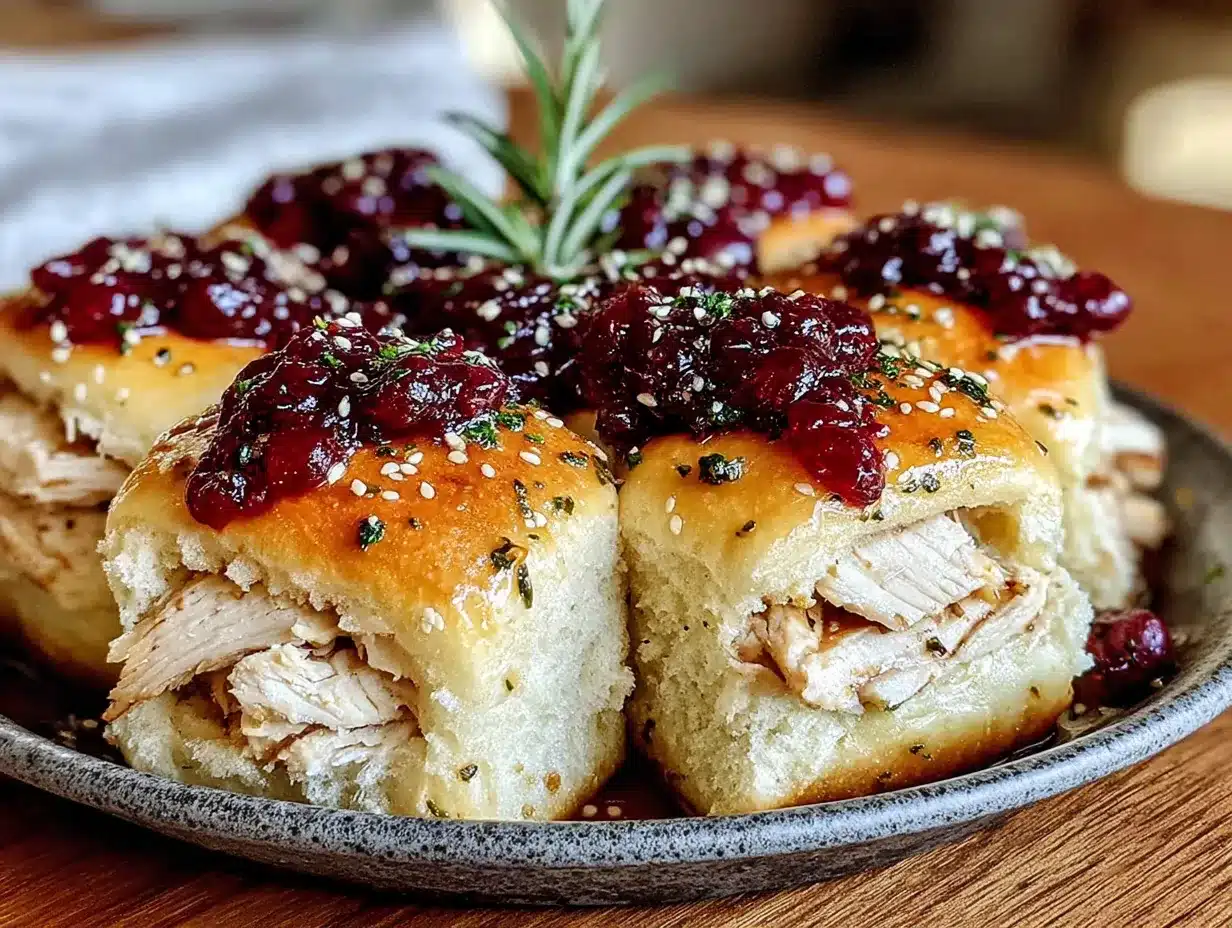
That day, Sandra casually handed me the secret to the perfect lighter turkey slider. It wasn’t a holiday. It wasn’t a party. It was just a Tuesday, and she was making something extraordinary out of leftovers and a little bit of garlic butter magic. I’ve been making these Lighter Pull-Apart Turkey and Cranberry Sliders with Garlic Butter ever since, and they’ve never once let me down.
Why You’ll Love This Recipe
These aren’t just another leftover turkey sandwich. These sliders are the kind of thing that makes you look forward to the day after Thanksgiving—or any day you have a little cooked turkey on hand. They’re quick, they’re satisfying, and they feel way more indulgent than they actually are. Here’s why they’ve earned a permanent spot in my recipe rotation:
- Quick & Easy: From start to finish, these sliders come together in about 25 minutes. That’s faster than ordering takeout, and honestly, it smells way better.
- Simple Ingredients: You probably already have most of what you need in your fridge and pantry. No hunting down obscure ingredients at a specialty store.
- Perfect for Leftovers: This is hands-down the best way to use up leftover turkey and cranberry sauce from a holiday meal. But honestly, I’ve been known to cook turkey just so I can make these.
- Crowd-Pleaser: I’ve brought these to potlucks, game-day gatherings, and casual dinners—they disappear every single time. Kids and adults both go crazy for them.
- Lighter Feel, Big Flavor: We’re using lighter ingredients without sacrificing that warm, buttery, savory-sweet magic. You get all the comfort, none of the guilt.
What makes these different from every other slider recipe out there? It’s the garlic butter. I mean, I know that sounds simple, but the way it soaks into those soft rolls and gets all toasty on top? That’s the game-changer. Plus, the balance between the savory turkey, the tangy-sweet cranberry sauce, and that rich garlic butter is just… perfect. It’s the kind of bite that makes you close your eyes for a second. Seriously.
What Ingredients You Will Need
This recipe uses simple, wholesome ingredients to deliver bold flavor and satisfying texture without the fuss. Most of these are pantry staples or common fridge items, so you’re probably already set. Here’s what you’ll need:
For the Sliders
- 12 slider rolls (soft, Hawaiian-style or brioche work beautifully—I prefer King’s Hawaiian for that slight sweetness)
- 1 ½ pounds cooked turkey breast, shredded or thinly sliced (leftover roasted turkey is ideal, but rotisserie chicken works in a pinch)
- ¾ cup whole-berry cranberry sauce (homemade or canned—both work great; I like Ocean Spray for consistency)
- 6 slices of reduced-fat Swiss cheese (the lighter cheese melts beautifully and keeps things from getting too heavy)
- 2 tablespoons light mayonnaise (helps bind the turkey and adds a touch of creaminess without overpowering)
- ½ teaspoon black pepper, freshly ground
- ¼ teaspoon salt
For the Garlic Butter Topping
- 4 tablespoons unsalted butter, melted
- 3 cloves garlic, minced (fresh is non-negotiable here—the flavor is so much brighter than jarred)
- 1 teaspoon dried parsley (or 1 tablespoon fresh, finely chopped)
- ½ teaspoon onion powder
- ¼ teaspoon salt
- 1 tablespoon grated Parmesan cheese (optional, but adds a lovely savory crust)
One thing I’ve learned from making these sliders over and over: the quality of your turkey matters. If you’re using leftover holiday turkey that was roasted well, you’re golden. If you’re starting from scratch, roast a turkey breast with some salt, pepper, and a little olive oil—nothing fancy. The turkey should be tender enough to pull apart easily with a fork. For the cranberry sauce, I’ve tried both homemade and canned, and honestly? They both work. The canned stuff has that nostalgic jellied texture that some people love, while homemade gives you more berry chunks and a slightly brighter flavor. Pick your favorite.
As for the rolls, don’t skimp here. Soft, slightly sweet slider rolls are the foundation of this whole thing. Hawaiian rolls are my go-to because they hold up well to the filling and get that perfect golden-brown top when brushed with garlic butter. If you’re watching your carbs, you can use whole wheat slider rolls—just know they’ll be a little denser.
Equipment Needed
You don’t need a fancy kitchen to make these sliders. Here’s what you’ll need:
- 9×13-inch baking dish (a glass or ceramic dish works best for even heating)
- Sharp knife or serrated bread knife (for slicing the rolls cleanly without squishing them)
- Cutting board
- Small mixing bowl (for the garlic butter)
- Pastry brush or spoon (for brushing the garlic butter on top)
- Aluminum foil (for covering the sliders while they bake)
- Measuring spoons
- Garlic press or knife for mincing
If you don’t have a 9×13 dish, a large cast-iron skillet works beautifully—it gives you those crispy edges on the outside rolls. I’ve also used a disposable aluminum pan when I’ve brought these to a potluck, and they turned out just fine. For the pastry brush, a silicone one is my favorite because it doesn’t shed bristles, but a regular brush or even the back of a spoon will do the job. Honestly, you don’t need anything fancy—just a few basic tools and you’re set.
Preparation Method
Let’s get cooking. This is one of those recipes that feels almost too easy, but the results are anything but basic. Follow these steps, and you’ll have a pan of golden, pull-apart perfection in no time.
- Preheat your oven to 350°F (175°C). While it’s heating up, get your baking dish ready. No need to grease it—the butter from the sliders will handle that.
- Prepare the turkey filling. In a medium bowl, combine the shredded or sliced turkey with the light mayonnaise, a pinch of salt, and the black pepper. Mix gently until the turkey is evenly coated. The mayo adds just enough moisture to keep the turkey from drying out during baking. Set aside.
- Slice the rolls in half horizontally. This is the trickiest part—you want to keep the rolls connected as much as possible. Using a serrated knife, carefully slice through the entire slab of rolls, cutting them in half like a giant sandwich. If the rolls are stuck together, gently pry them apart with your fingers. Place the bottom half of the rolls in your baking dish.
- Layer the cheese. Arrange the reduced-fat Swiss cheese slices evenly over the bottom layer of rolls. The cheese acts as a barrier, so the rolls don’t get soggy from the cranberry sauce. Plus, melty cheese? Always a good idea.
- Spread the cranberry sauce. Spoon the cranberry sauce over the cheese layer. Spread it gently with the back of a spoon—you want an even layer, but don’t press too hard or you’ll squish the rolls underneath. The sweet-tart cranberry is what makes these sliders sing.
- Add the turkey. Distribute the turkey mixture evenly over the cranberry sauce. Don’t pile it too high in the middle—try to keep it even so every slider gets a good amount of filling. Use your fingers to gently press the turkey down if needed.
- Top with the remaining rolls. Place the top half of the rolls over the turkey, lining them up as best you can. They might not fit perfectly, but that’s okay—just nudge them into place.
- Make the garlic butter. In a small bowl, combine the melted butter, minced garlic, dried parsley, onion powder, salt, and Parmesan cheese if using. Stir until everything is well mixed. The garlic should be fully incorporated—no big chunks.
- Brush the tops. Using your pastry brush, generously brush the garlic butter mixture over the tops of the rolls. Don’t be shy here—this is where the magic happens. Make sure every roll gets some butter. If there’s extra butter in the bowl, you can drizzle it over the sides of the rolls.
- Cover and bake. Cover the baking dish loosely with aluminum foil. Bake for 15 minutes. The foil traps steam and helps the rolls get soft and fluffy inside while the cheese melts.
- Uncover and finish. Remove the foil and bake for another 5-8 minutes, until the tops are golden brown and the edges are slightly crispy. Your kitchen should smell incredible at this point.
- Rest before serving. Let the sliders sit in the dish for 5 minutes before pulling them apart. This gives the cheese a chance to set slightly so everything stays together when you lift a slider out. Use a spatula to separate them gently.
One thing I learned the hard way: don’t skip the resting step. The first time I made these, I was too excited and pulled them apart immediately. The cheese was so molten that the whole thing kind of fell apart. They still tasted amazing, but they looked like a crime scene. Just wait the five minutes—I promise it’s worth it.
Cooking Tips & Techniques
After making these sliders more times than I can count, I’ve picked up a few tricks that make a real difference. Here’s what I’ve learned:
Keep the rolls connected. When you slice the slab of rolls in half horizontally, try to keep them in one piece. It makes assembly so much easier, and the sliders hold together better when they bake. If a few rolls separate, just nestle them back in place. No big deal.
Don’t overdo the mayo. Two tablespoons is the sweet spot. Too much, and the turkey gets soggy. Too little, and it’s dry. If your turkey is already on the dry side (leftover white meat, I’m looking at you), you can add an extra tablespoon of mayo. Just don’t go overboard.
Fresh garlic makes a difference. I know it’s tempting to use garlic powder when you’re in a hurry, but fresh garlic really shines here. It infuses the butter with that sharp, aromatic flavor that you just can’t get from the dried stuff. Mince it finely so it distributes evenly in the butter.
Watch the oven. Every oven runs a little differently. After you remove the foil, keep an eye on the tops. You want them golden brown, not burnt. If your oven runs hot, check them at the 5-minute mark. If they’re already browning fast, pull them out early.
Make ahead tip. You can assemble these sliders up to a day in advance. Just put them together in the baking dish, cover tightly with plastic wrap, and refrigerate. When you’re ready to bake, add the garlic butter right before putting them in the oven. You might need to add an extra 5 minutes to the covered baking time since they’re starting cold.
I once forgot to cover the sliders with foil and just baked them uncovered the whole time. The tops got super crispy—almost crunchy—and the centers were still a little cool. It was a mess. So yeah, that foil step matters. Don’t skip it like I did.
Variations & Adaptations
One of the best things about this recipe is how flexible it is. Here are some variations I’ve tried and loved:
Chicken Cranberry Sliders: Don’t have turkey? No problem. Shredded rotisserie chicken works beautifully here. The flavor is slightly different, but just as delicious. I’ve made these with leftover roast chicken from a Sunday dinner, and they were a hit.
Vegetarian Option: Swap the turkey for sliced portobello mushrooms that have been sautéed in a little olive oil and soy sauce. The earthy mushrooms pair surprisingly well with the sweet cranberry sauce. Or use a plant-based turkey substitute if that’s more your style.
Spicy Twist: Add a thin layer of cream cheese mixed with a teaspoon of sriracha or chipotle powder under the cranberry sauce. The heat cuts through the sweetness and adds a whole new dimension. My brother-in-law swears by this version.
Cheese Swap: Not a fan of Swiss? Try provolone, gouda, or even a sharp white cheddar. Each cheese brings its own personality to the sliders. Gouda gives it a smoky richness that’s especially good with the garlic butter.
Gluten-Free: Use gluten-free slider rolls. They tend to be a little more delicate, so handle them gently. The rest of the ingredients are naturally gluten-free, so this is an easy swap.
Dairy-Free: Use a dairy-free butter alternative and dairy-free cheese slices. Miyoko’s makes a great plant-based Swiss that melts beautifully. The garlic butter works just as well with vegan butter—just make sure it’s unsalted so you can control the salt level.
I once tried adding a layer of crispy bacon to these sliders, and honestly? It was amazing. Not exactly “lighter” anymore, but sometimes you just need bacon. If you’re feeling indulgent, go for it.
Serving & Storage Suggestions
These sliders are best served warm, right out of the oven, when the cheese is still melty and the tops are golden. Here’s how to serve and store them:
Serving Temperature: Serve them hot, but not straight-from-the-oven hot—let them rest for those 5 minutes first. They’re perfect at a warm, just-cooled-enough-to-handle temperature. I like to put the whole baking dish in the center of the table and let everyone grab their own. It’s a very casual, family-style kind of thing.
What to Serve With: These sliders are hearty enough to be a meal on their own, but they pair beautifully with a simple side salad (try a light vinaigrette to cut through the richness), sweet potato fries, or a bowl of tomato soup for dipping. For a holiday-themed spread, serve them alongside roasted Brussels sprouts or a simple green bean almondine.
Drink Pairings: A crisp apple cider or a light lager works well. For wine drinkers, a Pinot Noir or a dry Riesling complements the turkey and cranberry beautifully. If you’re serving these at a game-day party, a cold beer is always a good call.
Storage: Leftover sliders (if you have any) can be stored in an airtight container in the refrigerator for up to 3 days. The rolls will soften a bit, but the flavors actually get better as they meld together overnight.
Reheating: The best way to reheat these is in the oven at 350°F for about 10 minutes, covered with foil to prevent the tops from burning. You can also use a microwave, but the rolls will be softer and less crispy. If you’re in a hurry, microwave them for 30-45 seconds per slider. Not ideal, but it works.
Freezer-Friendly: You can freeze the assembled, unbaked sliders for up to 2 months. Wrap the entire baking dish tightly in plastic wrap and then foil. When you’re ready to bake, thaw overnight in the refrigerator, add the garlic butter, and bake as directed. I’ve done this for holiday prep, and it’s a lifesaver.
One thing I’ve noticed: the flavors really deepen after a day in the fridge. The garlic butter soaks into the rolls, and the cranberry and turkey get all cozy together. Cold leftovers straight from the fridge? Honestly, they’re pretty great too.
Nutritional Information & Benefits
These sliders are a lighter take on a classic comfort food, and the numbers reflect that. Here’s the estimated nutritional breakdown per slider (based on 12 sliders):
- Calories: 245
- Protein: 18g
- Carbohydrates: 22g
- Fat: 9g
- Saturated Fat: 4g
- Fiber: 1g
- Sugar: 8g
- Sodium: 410mg
These numbers will vary depending on the specific brands and ingredients you use, but this gives you a solid ballpark. The reduced-fat cheese and light mayonnaise keep the fat and calories in check without sacrificing flavor. Turkey is a lean protein source, rich in B vitamins and selenium, which supports immune function. Cranberries are packed with antioxidants and vitamin C, making this a surprisingly nutrient-dense comfort food.
If you’re following a low-carb or keto diet, you can substitute the rolls with lettuce wraps or low-carb slider buns. The filling itself is naturally low in carbs. For those watching their sodium, use low-sodium turkey and unsalted butter, and go easy on the added salt. This recipe is also easy to adapt for gluten-free and dairy-free diets, as mentioned in the variations section.
Honestly, I love that this recipe feels indulgent but doesn’t leave you feeling weighed down. It’s the kind of meal you can enjoy on a regular Tuesday without any guilt—and that’s exactly what Sandra was doing when I first stumbled into her kitchen.
FAQs
Can I make these sliders ahead of time?
Absolutely! You can assemble the sliders up to 24 hours in advance. Just keep them covered in the refrigerator and add the garlic butter right before baking. You may need to add an extra 5 minutes to the covered baking time since they’ll be cold from the fridge.
Can I use leftover chicken instead of turkey?
Yes, definitely. Shredded rotisserie chicken or leftover roast chicken works perfectly. The flavor is slightly different, but just as delicious. In fact, I’ve made these with chicken more times than I can count when turkey wasn’t available.
What if I don’t have slider rolls?
You can use dinner rolls or even small brioche buns. Just make sure they’re soft and slightly sweet for the best texture. If using larger buns, you might need to adjust the baking time slightly. Keep an eye on them.
Can I freeze these sliders?
Yes! Freeze the assembled, unbaked sliders for up to 2 months. Wrap the dish tightly in plastic wrap and foil. Thaw overnight in the fridge, add the garlic butter, and bake as directed. They’re a great make-ahead option for holiday prep.
How do I prevent the sliders from getting soggy?
The key is the cheese layer. Placing the cheese directly on the bottom rolls creates a barrier that keeps the cranberry sauce from soaking into the bread. Also, don’t overdo the cranberry sauce—a thin, even layer is all you need. And definitely don’t skip the resting time after baking.
Conclusion
These Lighter Pull-Apart Turkey and Cranberry Sliders with Garlic Butter are the kind of recipe that feels like a secret weapon. They’re easy enough for a weekday dinner, impressive enough for a holiday gathering, and flexible enough to adapt to whatever you have on hand. Every time I make them, I think back to that Tuesday in Sandra’s kitchen—the smell, the casual shrug, the way she made something extraordinary feel like no big deal.
I hope you’ll give these sliders a try and make them your own. Maybe you’ll add a little spice, swap in a different cheese, or serve them with your favorite soup. However you make them, I’d love to hear about it. Drop a comment below and tell me how they turned out—did you stick with the original recipe or put your own spin on it? Share a photo if you’re feeling fancy. And if you know someone who’s sitting on a pile of leftover turkey and doesn’t know what to do with it, send them this recipe. Trust me, they’ll thank you.
Happy cooking, friends. Here’s to more casual Tuesdays that turn into something delicious.
Pin This Recipe!
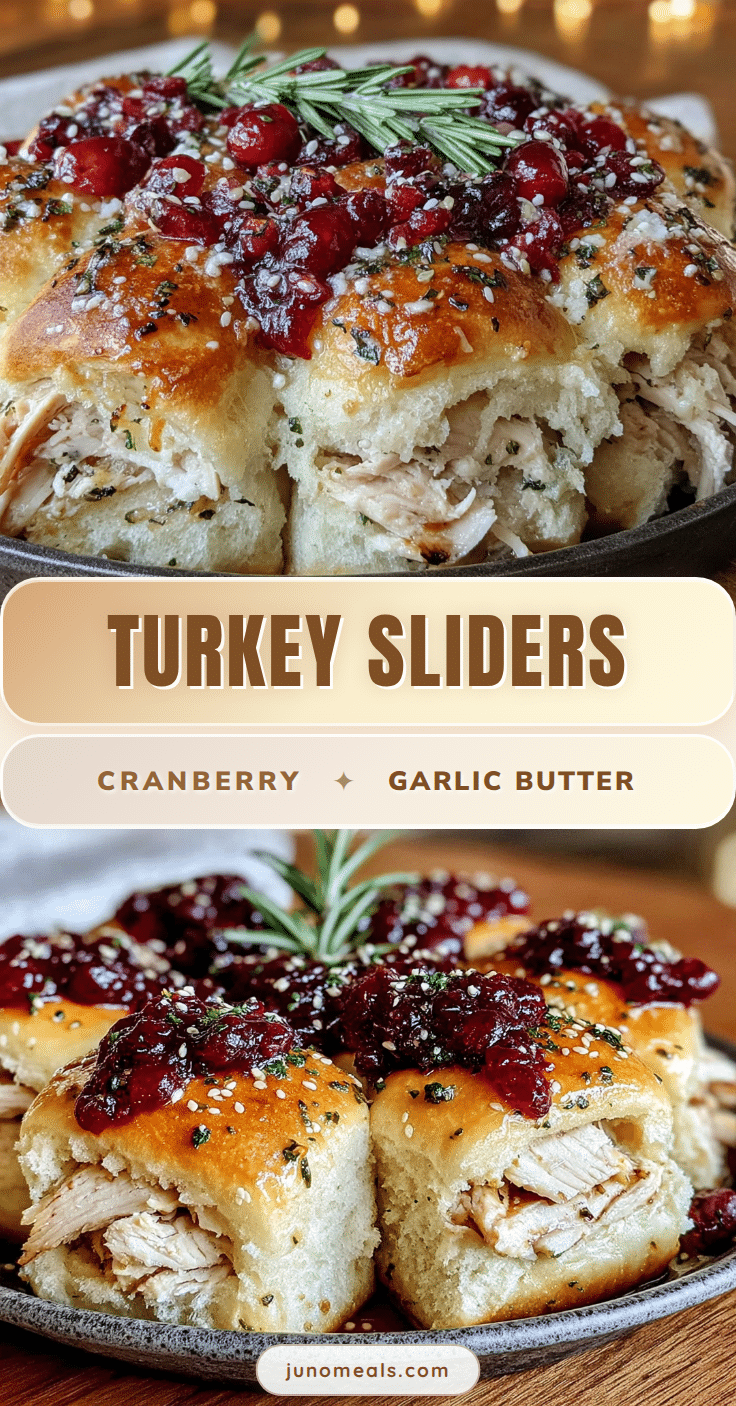
Easy Lighter Turkey Cranberry Sliders with Garlic Butter

These lighter pull-apart turkey and cranberry sliders are brushed with garlic butter and baked to golden perfection. They’re quick, easy, and perfect for using up leftover turkey or chicken.
- Prep Time: 10 minutes
- Cook Time: 20 minutes
- Total Time: 30 minutes
- Yield: 12 sliders 1x
- Category: Main Course
- Cuisine: American
Ingredients
- 12 slider rolls (soft, Hawaiian-style or brioche)
- 1 ½ pounds cooked turkey breast, shredded or thinly sliced
- ¾ cup whole-berry cranberry sauce
- 6 slices reduced-fat Swiss cheese
- 2 tablespoons light mayonnaise
- ½ teaspoon black pepper, freshly ground
- ¼ teaspoon salt
- 4 tablespoons unsalted butter, melted
- 3 cloves garlic, minced
- 1 teaspoon dried parsley
- ½ teaspoon onion powder
- ¼ teaspoon salt
- 1 tablespoon grated Parmesan cheese (optional)
Instructions
- Preheat your oven to 350°F (175°C).
- In a medium bowl, combine the shredded turkey with light mayonnaise, salt, and black pepper. Mix gently until evenly coated.
- Slice the rolls in half horizontally, keeping them connected as much as possible. Place the bottom half in a 9×13-inch baking dish.
- Arrange the Swiss cheese slices evenly over the bottom layer of rolls.
- Spoon the cranberry sauce over the cheese and spread into an even layer.
- Distribute the turkey mixture evenly over the cranberry sauce.
- Place the top half of the rolls over the turkey, lining them up.
- In a small bowl, combine melted butter, minced garlic, dried parsley, onion powder, salt, and Parmesan cheese (if using). Stir well.
- Brush the garlic butter mixture generously over the tops of the rolls.
- Cover the dish loosely with aluminum foil and bake for 15 minutes.
- Remove the foil and bake for another 5-8 minutes, until tops are golden brown and edges are slightly crispy.
- Let the sliders rest in the dish for 5 minutes before pulling apart and serving.
Notes
Don’t skip the resting step after baking to allow the cheese to set. For make-ahead, assemble up to 24 hours in advance, refrigerate, and add garlic butter just before baking. For freezing, assemble unbaked, wrap tightly, and freeze for up to 2 months; thaw overnight in the fridge before baking.
Nutrition
- Serving Size: 1 slider
- Calories: 245
- Sugar: 8
- Sodium: 410
- Fat: 9
- Saturated Fat: 4
- Carbohydrates: 22
- Fiber: 1
- Protein: 18
Keywords: turkey sliders, cranberry sliders, leftover turkey, garlic butter sliders, easy sliders, lighter sliders, pull-apart sliders